As students enter third grade, they make a transition that includes learning how to learn. They are no longer considered “primary” students and the rigor and expectations on them begins to increase. But what if we could use math to also help them learn the valuable skill of note-taking? It’s never too early to start teaching note-taking skills. As our little learners climb up the grade ladder, the concepts, especially in math, just keep piling up. We can prepare them for the future by not only teaching 3rd grade math, but also how to take notes in math class.
Math wheels are the perfect tool to help third grade students master those crucial math concepts and learn some note-taking skills too. It’s a tool that sets them up for success down the road. Today, I’m sharing more about what math wheels are, their benefits, and a few examples of how to use them with your students!
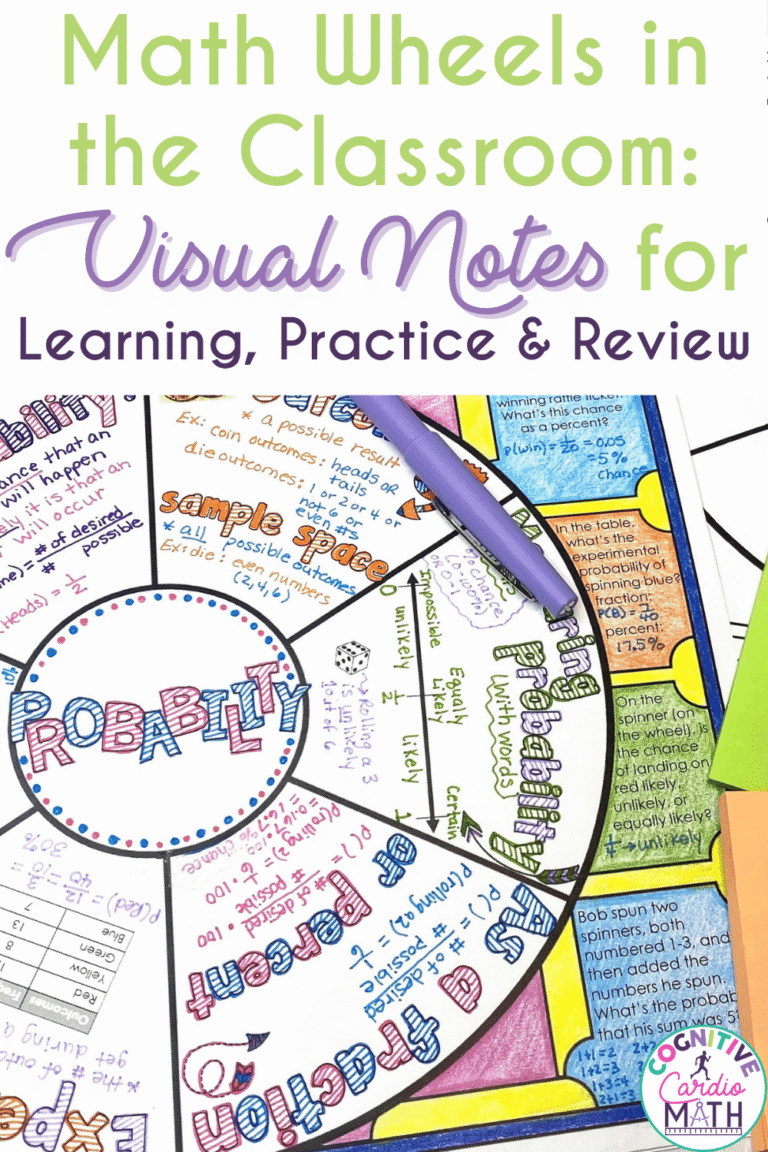
Math Wheels are Note-Taking Graphic Organizers
Using the math doodle wheel can make note-taking engaging and approachable in the 3rd grade math class. When we’re introducing note-taking skills, we want to make sure students are excited and buying into them so they continue to use them.

Every student receives a math wheel for the math skill we’re working on. The circle is divided into sections, the number varying depending on how many steps or concepts are needed for the math skill. Each section zeros in on important math terms and/or one aspect of the math concept. This helps to make sure they understand the first step or concept before jumping into the next one.
Throughout the lesson, students dive in, jotting down key vocabulary words and meanings, breaking down the problem-solving steps, and applying the step or concept immediately through examples. Once students finish writing the notes, it’s a great idea to model and explain how doodles and adding color are beneficial to learning. Color or a doodle can help with retention, making it easier for students to recall the information related to the math concept or to a step in a process
To learn more about the benefits of using math wheels as note-taking graphic organizers, make sure to explore How to Transform Your Upper Elementary or Middle School Math Class With This Note-Taking Method!
Color and Visuals Enhance Note-Taking and Mastery
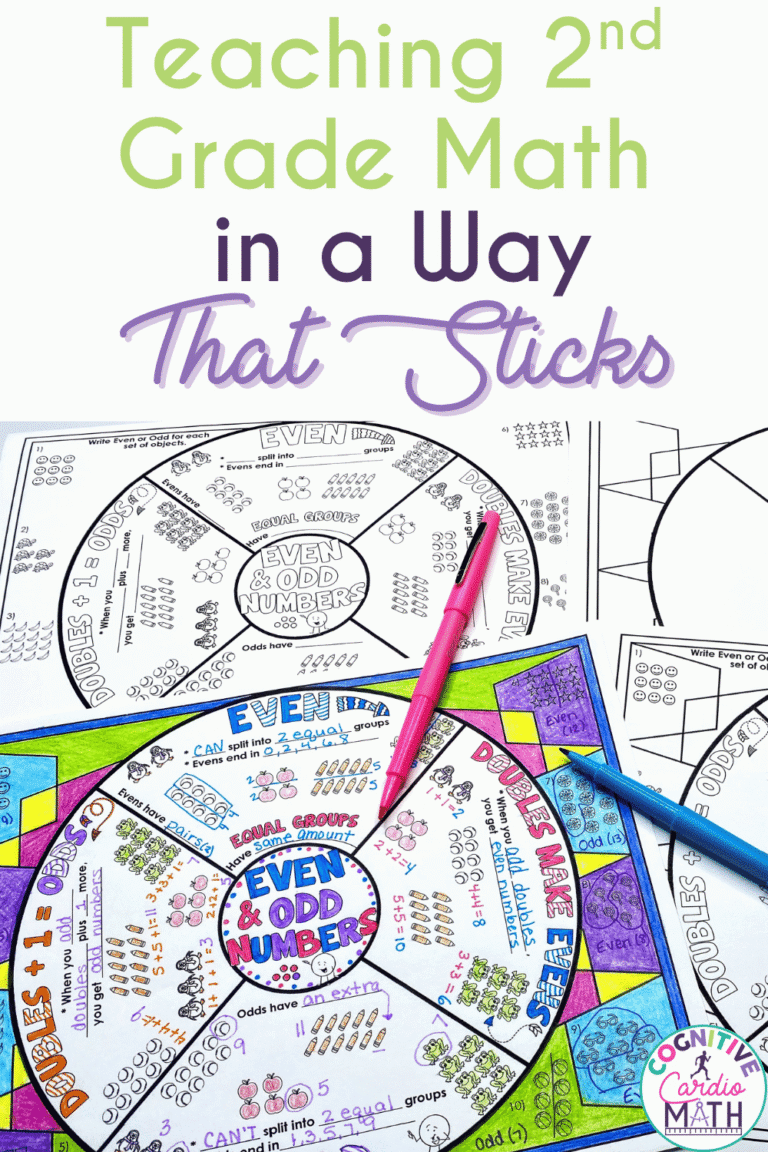
The secret component that makes math wheels truly unforgettable is the colors and visuals! Trust me, when it comes to helping 3rd graders retain information, a splash of color and a sprinkle of visuals can work wonders.
When we think about it, our brains are like sponges, soaking up all the sights and sounds around us. That’s where colors come in. Each section of the math wheel pops with its own unique doodles or color coding, making it easy for students to differentiate between definitions, examples, and strategies.

Adding the color and the visuals is more than making things look pretty. It’s about enhancing understanding. Visual learners in particular thrive on images and diagrams. That’s why I make sure to include plenty of visuals or doodles. Whether it’s a little doodle illustrating a math concept or a diagram breaking down a problem-solving strategy, these visuals speak volumes to students.
When information is presented in a visually appealing way, it sticks. I’ve seen it time and time again. Teachers of all different grade levels have shared that their students recall concepts more easily when they’re associated with colors and engaging visuals. They help kiddos create a mental picture they can refer back to whenever they need a little memory boost. I bet you can think of a time that you were able to remember a fact more easily because it was in a different color, it was associated with something else, or because you could visualize it on the page.
3rd Grade Math Wheels Make Differentiation Easy
When it comes to learning 3rd grade math, my math wheels are impactful tools for your students. I’ve always taught my students about the beauty of multiple ways to approach math concepts. As teachers, we recognize that everyone’s brain is wired a little differently. What clicks for one student might leave another scratching their head. That’s why I’m all about providing students with a toolkit of strategies to tackle math from different angles. These wheels bring that lesson to life in a tangible way.

From definitions to step-by-step examples and colorful visuals, it’s all there in one glance. Each wheel showcases mastery examples of different problem-solving approaches in action.
They’re a reference tool that students can turn to all year long. Need a refresher on that tricky concept from way back in September? No problem! Flip to your Math Wheel graphic organizers, and you’ve got just what you need for a quick review!
Math wheels are all about empowering students to own their math journey. My ultimate goal in math is to help them see that math is doable. When they start recognizing that, watching their confidence soar as they conquer math from every angle makes this math teacher’s heart quite happy!
How to Use 3rd Grade Math Wheels
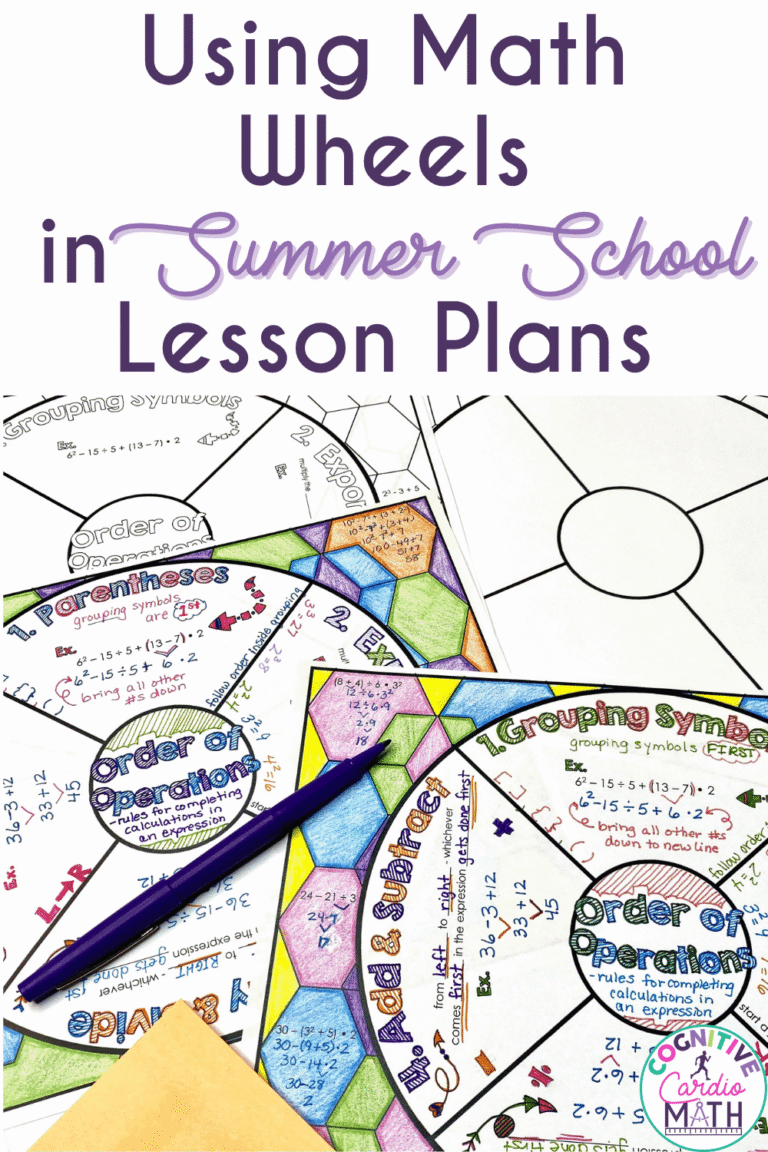
Every math wheel tackles a unique math concept or skill. The math wheel makes it easy to break down the important information into smaller chunks that are easier for students to grasp. As you read through the Area example below, notice how the math wheel guides students to write their notes and draw examples of the most important information for each step.
Let’s use the Area math wheel as an example so you can see step by step how I’d use the math wheel to teach area and guide students into taking notes on this topic.
The targeted math skill is always written in the middle of the circle. Depending on the lesson, each wheel may feature a different number of sections tailored to the specific concept being taught.
1. Area is. . .
The first section on the Area wheel defines what area means, to help students understand that area is the amount of space a shape covers. After discussion and accessing prior knowledge, students write the definition and then color the unit squares that make up the square and rectangle, to reinforce the concept that area is basically the interior of the shape.

This section also covers how area units are always squared. For example, cm2, m2, in2 and units2.
2. Use Unit Squares
Moving to the right, the next section focuses on using unit squares. In this section, discuss how unit squares have side lengths of 1 unit; students can count the unit squares to find the area of a shape.

This section has two examples. Starting with the first square on the left, students write a number in each unit square, starting with one and going through 20. That means there are 20 unit squares total for the area that makes up the space inside. Our official answer would look like A = 20 units2 (u2).
In the second example, students again number each unit square inside the larger square from one through 16, which means that there are 16 unit squares inside. Our answer is A = 16 units2 (u2).
3. Multiply
Once students understand the concept of area and the unit squares that make up a shape, they’re ready for the formula. The ‘Multiply’ section guides them through using multiplication to find the area, which is a bit quicker than numbering unit squares. This section includes the formula, which is A = L x W or Area = Length times Width.

The first example takes students step by step with a 3 x 3 square. Students can find the area by looking at the length and the width. The length is 3, and the width is 3, so students multiply that together to find 9 u2. To check that answer, students can also number each unit square for a total of 9 u2.
The second example has a rectangle with 10 unit squares inside, with 2 rows and 5 columns. Students multiply 5 and 2 to find the area, which equals 10 u2.
4. Decomposing
In this section, it’s important to discuss what decomposing means. You might relate it to decomposing numbers, if you’ve already covered that concept. Then students can add the note defining decomposing as breaking a shape into smaller rectangles (in this case). In the first example, there are A LOT of unit squares students would need to number if they used that method! Instead, they can decompose.
To incorporate color here, students can use two different colors to show the two smaller rectangles they’re breaking the large one into. Using one color, students can shade in 5 columns and 6 rows, for an area of 30. Then with a second color, students shade the remaining squares in 4 columns and 6 rows, which is an area of 6 x 4, or 24. Students then add 30 and 24 to find 54 u2. Students may suggest other ways the large rectangle can be decomposed, and you might choose to show some other ways on the board during this discussion.

The second example gives students exposure to an irregular shape. One way to look at this shape is as a smaller rectangle stacked on top of a larger rectangle. Starting with the larger rectangle, students can simply use the area formula of length times width. This is 5 x 8, which equals 40. For the smaller rectangle, students multiply 4 x 6, which equals 24. Adding 40 and 24 together, students find the area of 64 u2.
This irregular shape could be decomposed in another way, which you can explore with students. A second way to look at this is as a smaller rectangle attached to the left side of a larger one. In this case, students would multiply 2 x 5 and 9 x 6 to find the areas of the rectangles.
So often, there’s more than one way to solve a problem. Before starting to solve this one, you may want to ask students which way they would decompose the shape, and again show multiple ways on the board before having students add their solutions to the wheel.
5. Find Area!
In the last section, there are a few more chances to practice finding areas in different ways. The first problem gives students the chance to subtract a smaller rectangle from the larger rectangular area. Students multiply 6 and 8 to equal 48 for the entire large rectangle – this is what the area would be without the small rectangle that’s missing. Then, multiply 1 by 4 to get an area of 4 for the small rectangle. Since it’s acting as a small cut-out, students subtract 4 from 48 to find the final area of 44 ft2.

The second problem provides practice for the decomposing strategy, so students can use their two colors again.
One way to decompose – students color in the 9 unit squares that make a square on top of the rectangle. Its width and length are both 3, for a total of 9 when multiplied together. Then, students can color in the rectangle, or remaining unit squares, with their second color. It has a length of 9 and a width of 3, which, multiplied together, is 27. To finish it off, students add 27 and 9 to find the area of 36 u2. Again, it’s a great idea to help students explore a second way to solve.
The last example is a word problem. There’s a rectangle with one side measuring 10 cm and another measuring 8 cm. Students need to find how many square centimeters James used. So, they look at the length and width and multiply 10 and 8, which equals 80 cm2.
Ready to Use 3rd Grade Math Wheels in Your Classroom?
Now that you’ve seen a math wheel in action, can you see just how helpful this tool would be to your third grade students? It’s truly a game changer that not only helps them master 3rd grade math skills but also learn the important skill of note-taking. If you’d like to have math wheels for many 3rd grade math concepts you can find those in my TPT store.
With math wheels by your side, you’re not just teaching math, you are equipping your students with a skill they will use for years to come. From exploring multiple problem-solving strategies to embracing the power of colors and visuals, these wheels are the ultimate tool for empowering your students to take charge of their math journey. So, get those wheels spinning, and watch as your 3rd graders soar to new heights of math mastery!
Save for Later
Remember to save this post to your favorite math Pinterest board so you can build your students’ note-taking skills with math wheels!
")