Great End of School Year Activity!
 This post was taken from my old blog and revised…with much more detail added:-) Originally posted in June of 2014!
Tessellations in middle school math – one of my all-time favorite activities! I especially love using tessellation activities at the end of the school year….art projects like these keep students engaged:-)
We normally take several days to work on tessellations…sometimes more, depending on how much time we have.
What Are Tessellations?
First off, what is a tessellation? I show students a few examples and ask what they believe a tessellation is. They typically come up with the idea that a tessellation is the repeating of a shape or shapes in a pattern. I usually have to add the idea that there are no gaps or overlaps in a tessellation.
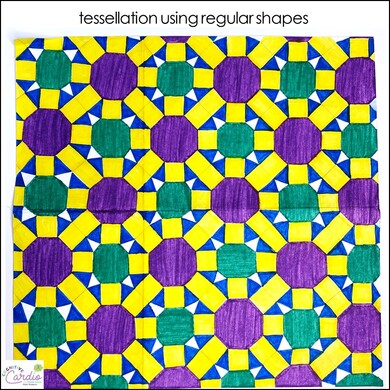
Creating Tessellations with Regular Shapes
Creating Tessellations with Irregular Shapes
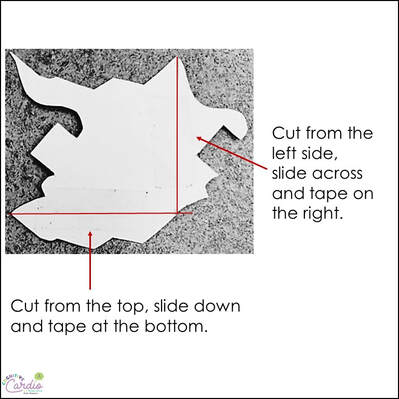
Step 1: Draw lines on the left side and top of the square. These can be curved or pointed….whatever the students feel like. The more the detailed the line, the more complex the tracing becomes.
Step 2: Cut along the lines that were drawn.
Step 3: Tape the shape cut from the left side of the square onto the right side of the square. This step can be tricky. I encourage student to slide the shape over to the right, to be sure they don’t change the orientation of the shape.
- The shape must be aligned as precisely as possible so the tracing doesn’t get ‘thrown off.’ (This is shown in the video below)
Step 4: Tape the shape cut from the top of the square onto the bottom of the square.
Deciding on the Tessellation Design

This is always fun because the students are so creative, and we learn how we might all see something different depending on the perspective:-)
Creating Tessellations with Individual Shapes

When my math periods were longer (when I taught 5th grade) and we had a little more flexibility in the day, we would trace the templates onto colored paper, and draw the details onto each individual shape, and then glue them to a background.
One thing I liked about this method was that if the shapes weren’t perfect, we could adjust them and overlap them a tiny bit as we glued them onto a background paper, so the tessellation would then appear pretty perfect.
Creating Tessellations by Tracing
Sometimes when students trace directly onto the background, if the shapes weren’t taped precisely enough or the student doesn’t trace precisely enough, students get half-way done and the shapes don’t ‘fit’ where they should in the tracing any more….the space for the new shape is too big or too small for the tracer. Sometimes it gets so ‘off’ that they need to start over.
Tracing steps:
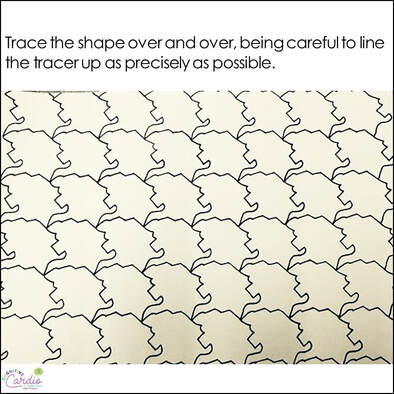
1) Trace the template over and over in pencil, as precisely as possible.
2) Go over pencil with thin black Sharpie.
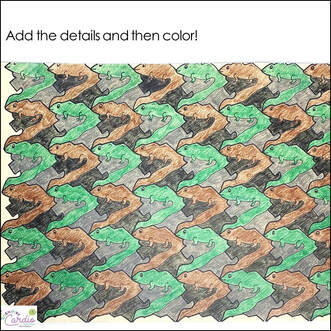
3) Add the details to each shape.
4) Color the pattern (colors should be in a pattern as well).
Creating Tessellations Video
|
|